Tom has 3 guitars, 2 are on stands and one is tucked away down the side of the book case in the living room. The 2 on stands used to be in the living room, but we moved them out to make way for the Christmas tree, they ended up in the bedroom and never came back.
I liked having that bit extra space in the living room, and I finally found a place for the canvases here, where the guitars used to be.
Photo from an upcoming post on flowers!
However due to the mould in the bedroom, the guitars were starting to get mouldy. Considering the Fender is the most valuable thing we own this is not good. I also liked the pop of yellow it brought into the living room, and I want to try to bring more colour in. So the Fender is now back in the corner in front of the CD player, the corner does look a little cluttered so I might move some things out but for now it lives here.
I really need to get a cable tidy in here asap! I like using the guitars as a decor accessory, as otherwise they would just be in cases behind the wardrobe or somewhere and never be seen. Since we have currently some nice yellow daffodils, a plant in a yellow planet and some green and yellow ikat cushions we are starting to get some more yellow in here now.
The other guitar lives in the dining area now, I saw this little spot was empty after we moved the litter tray. Cable tidy needed in here too I really must get on that it's a job I've been meaning to do since we moved in.
Tom will give them a clean as I have no idea what to use on them and they are pretty mouldy :(
We had people round to assess where to put the PIV unit last week which the landlord has sorted out to stop the mould, so hopefully that will be installed soon then I will have a mould purge and just bleach the entire flat! Then we will (fingers crossed) not have to worry about it again.
I hope you all had a great weekend, we went to the final caterer tasting so hopefully will pick one soon and I'll write a post about it on the wedding blog.
Showing posts with label living room. Show all posts
Monday, 24 March 2014
Monday, 26 August 2013
Before the big declutter
I'll post our list for the big declutter on Wednesday, so if you're playing along at home get ready to get rid! See last weeks post here on the method.
I thought I'd share some before photos today because A.the whole flat is clean after a bank holiday housework blitz and B. I'm hoping it will look a bit different in a few weeks!
The Kitchen - Problem areas:
Top of the microwave
Countertops
Food cupboard
The thing on top of the hob is the oven shelves soaking in the overnight oven cleaner
The Living Room - Problem Areas:
Box under coffee table
Corners by the bookshelves
The dining room/hallway (not really sure what to call his room now it's no longer the 'office') - Problem Areas:
Shelves under the turtle tank
The Bathroom - Problem Areas:
Cosmetics
Built in cupboard
The Hallway - Problem Areas
Bookshelves
Cupboard
Music Equipment
Shoes
Computer Equipment
Chairs (we have 4 dining chairs and an armchair in here and never sit on any of them!)
This box is also still here, Tom needs to sort it out or it will just be labelled 'Sell' and become the start of the car boot pile...
The Bedroom - Problem Areas:
Under the bed
Ottomans
The bag on the bed is full of clothes that were on ebay and ended yesterday and I'm either sending off or if they didn't sell getting rid of elsewhere
So that's our flat as of yesterday, pretty clean and tidy but cluttered in some areas. I can't wait to get rid of some things and make some room!
I thought I'd share some before photos today because A.the whole flat is clean after a bank holiday housework blitz and B. I'm hoping it will look a bit different in a few weeks!
The Kitchen - Problem areas:
Top of the microwave
Countertops
Food cupboard
The thing on top of the hob is the oven shelves soaking in the overnight oven cleaner
The Living Room - Problem Areas:
Box under coffee table
Corners by the bookshelves
The dining room/hallway (not really sure what to call his room now it's no longer the 'office') - Problem Areas:
Shelves under the turtle tank
The Bathroom - Problem Areas:
Cosmetics
Built in cupboard
The Hallway - Problem Areas
Bookshelves
Cupboard
Music Equipment
Shoes
Computer Equipment
Chairs (we have 4 dining chairs and an armchair in here and never sit on any of them!)
This box is also still here, Tom needs to sort it out or it will just be labelled 'Sell' and become the start of the car boot pile...
The Bedroom - Problem Areas:
Under the bed
Ottomans
The bag on the bed is full of clothes that were on ebay and ended yesterday and I'm either sending off or if they didn't sell getting rid of elsewhere
So that's our flat as of yesterday, pretty clean and tidy but cluttered in some areas. I can't wait to get rid of some things and make some room!
Labels:
bathroom,
bedroom,
before,
decluttering,
dining room,
entrance hall,
flat,
hallway,
home,
kitchen,
living room,
organisation,
storage
Sunday, 12 May 2013
Progress
We've been living in our flat 6 months now, so I thought it's a good time to look back and see what progress we've made (and what we still have left to do...which is plenty!)
Let's start with the kitchen, probably the room that's least changed
We've decluttered and added in some storage jars and storage solutions, also we've added in some finishing touches like the 'keep calm' sign. Still left to do in here are new mugs (thinking those DIY sharpie decorated ones that are all over Pinterest), new bread bin and mug tree, new canisters for tea coffee and sugar (thinking silver metallic) new recycling bin, maybe a rug or at least a doormat, new fruit bowl and possibly a window treatment. Also we still need to declutter some problem area like the top of the microwave.
Onto the living room
We got the new bookshelves and I changed the basket under the table for a larger one with a lid (It came with the ottomans from the bedroom), we also added in my DIY runner. Other than that the changes have been minor rearrangements of frames and CDs etc, I want to eventually get an ottoman or trunk to use as a coffee table, change the TV unit, add some art/photo frames on the fireplace (where we have been told we can put picture hooks, yay!), add more pillows to the sofa, maybe make a faux roman blind for the window (to go over the existing boring one) and generally add in a bit of colour as the room is a bit bland! Possibly thinking yellow to go with the Fender...
The into the Office
We have some art on the tank and a mat under the cat litter tray, but the desk is now even more of a mess as we have 2 PC screens at the moment (anyone want to buy one?!). We are looking at the whole computer situation, as I have my new netbook (which came with one of those screens) so very rarely use the desktop, Tom uses it sometimes but if we had a laptop that did iTunes and Tom could play games on we could get rid the desktop, freeing up some space. This all costs money though so will be something we sort out gradually. We also want to get a new desk and new desk chair, and possibly a rug under the desk. The turtle tank will also need replacing at some point (see this post on the leak we had the other week!) but that's also something quite expensive that we will need to save up for.
Then into the bathroom
This room, like the kitchen, hasn't really changed a great deal it has mostly just been decluttered and I'm trying to not buy more than one bottle of something at a time (you know when your shampoo is on offer so you buy 5 bottles...yeah I'm trying not to do that). I want to get some more art or something in here as it's a bit bland, I'm thinking on the back of the toilet as I like the lilies there in this post. Also I think we need a new bath mat as our has goe a bit off white, new towels probably soonish as well as I bought really cheap ones and they're starting to go a bit off colour (they also looked great in our last bathroom but I'd prefer black or white ones here).
The bedroom, it was gross before!
We've gotten rid of the 2 armchairs that were in there, reorganised my shoes, moved the trunk in from the hallway, got new wardrobes, got ottomans for storage on top of the wardrobes, rationalised the stuff under the bed and moved a lot of it out to the wardrobe in the hallway, brought the canvas in from the office, got new paperwork storage and generally tidied up! To be honest it still has a long way to go, I want to get a new bed, get bedside tables, rearrange the furniture so the chest of drawers isn't in front of the window (makes it hard to open the window), add some art or photos to the chimney breast (again this is where we've been told we can put picture hooks) get new bedding and a mirror, get some bedside lamps and bring a bit of a cohesive colour scheme in (so far we have about 10 different wood tones and 5 different textiles in here and it looks a bit crazy). It all seems to hinge on the new bed I so once we have that we can do the rest.
Then onto the entrance hall way, probably the most transformed room so far!
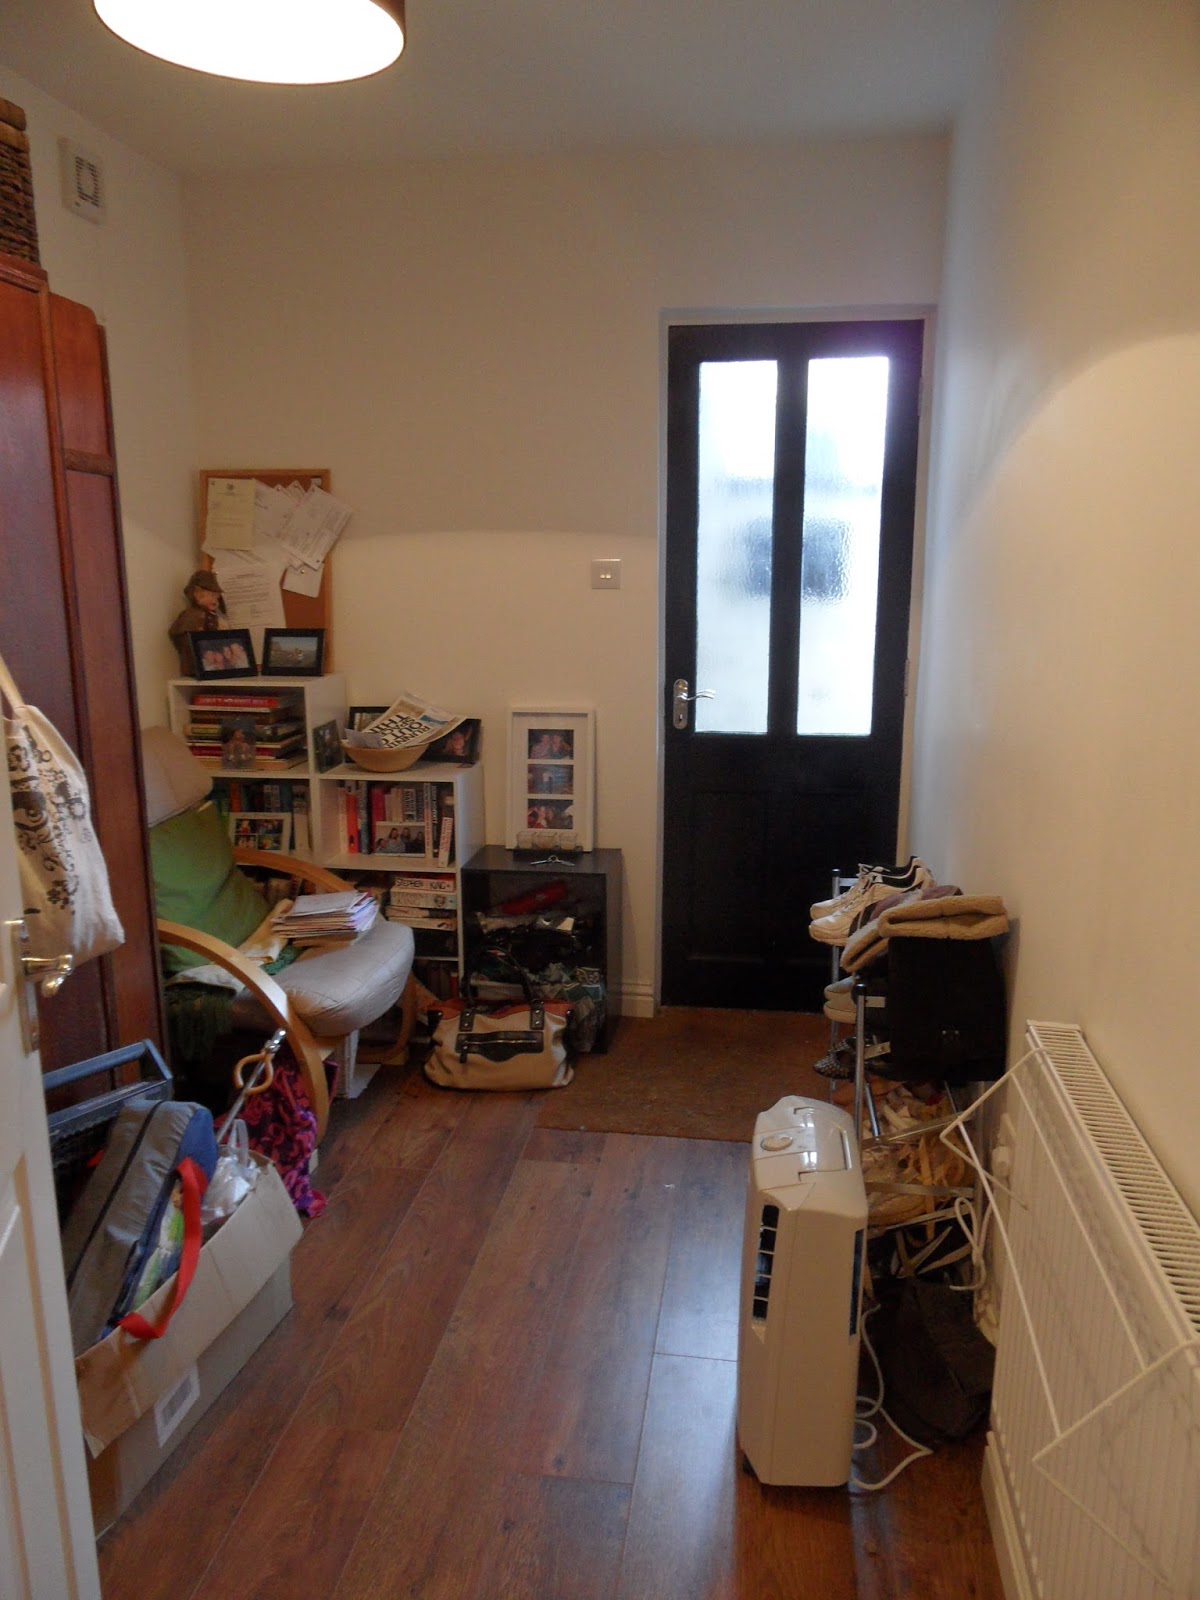
I reorganised in here a few times before getting our lovely big wardrobe to put all our junk in, it's a room that isn't really used by us except to walk through when we come in and out of the flat and for storage, so really I want to give this space a use other than drying clothes. As we don't spend any time in here more often than not it's full of clothes airers with washing drying on them, so you come in the door and it looks like this
Not exactly a warm welcome. So our aim in here is to maximise space so we could actually spend time in here, I'm thinking a reading nook as all the bookshelves are in here.
Onto the outside space, really we have just planted some things and are waiting to see how they do but it looks better already in the back garden
We're just waiting for seeds to grow and plants to fill in, then we might get a few more pots and some pretty garden things but we will build it up over time. There's not been any change in the front of the flat, not a lot we can change really!
You can see more on the garden here, and here.
There's the last 6 months of projects and changes, it's nice to look back and what you've achieved sometimes and see how much progress you've made even though there is plenty left to do!
Labels:
after,
bathroom,
bedroom,
courtyard,
decorating,
entrance hall,
flat,
garden,
hallway,
home,
kitchen,
living room,
office,
organisation,
outside,
property,
recap,
renting,
tenant,
to do
Sunday, 5 May 2013
Runner - Phase 3
The third and final part, actually getting this thing made! I've spent a while gathering the materials for making my own runner, you can see the first part here and the second part here.
This is all you need (note the end chopped off the runner as it was too long), some spray adhesive (I went for carpet adhesive), tape (I used B&Q own brand 'high strength gaffer tape' as it's a strong adhesive), a sealant (which I ended up not using!) and some drop cloths to protect the floor.
Step 1 - Measure the width of fabric you need, remember to allow a good few inches either side for the fabric to fold underneath. Then cut to size. I was doing all this in the hallway and going through into the office, as it's the longest stretch of uninterrupted floor that we have.
Step 2 - Cover the whole place in drop cloths and lay out your rubber matting or rug or whatever you're using as a base. You might also need to curse at the doorway and try to find another area to do this, fail and decide to just move the rug once you get to the door or do this thing in two halves.
Step 3 - Line up the fabric and leave enough over at the start to fold underneath.
Step 4 - My technique was to then fold the fabric back into a loose roll, stick the first part down, then just keep spraying the rug and the fabric in sections and unrolling, smoothing out as you go. The pictures probably explain it better!
I knelt on the part that I had already stuck down after smoothing it out, so I could spray the next part and then fold it over and repeat, moving the drop cloth along so I didn't get any adhesive on the front of the fabric.
The carpet adhesive stuck together instantly and was dry in only 15 minutes, so it didn't leave room for error, but also that was good as it meant when I got to the door I could fold the start end up as it was dry and pull the rug through into the hallway and not have to try to negotiate the doorway.
Step 5 - Leave the adhesive to dry, then flip over. It's a good idea to use a fresh drop cloth, as you don't want to get carpet adhesive on the front of the fabric, and that stuff gets everywhere!
Step 6 - Fold the edges over and stick them down. Make sure they're pulled in tight and the edges are all even.
Just fold the edges like wrapping a present, nice and neat you don't want any bumps showing on the top.
Step 7 - Edge the fabric with the gaffer tape to make sure it's really stuck down.
I left everything to dry overnight to make sure all the adhesive was dry and not still smelly before flipping it back over.
So here it is!
There is one more step, which would be to coat it with the poly finish, but I remembered at this point that we have a fabric protective spray (for car interiors) that would maybe be better as it's made for fabric. So Tom gave it a coat of that and we'll see if it does the job. It doesn't make it wipeable like a coat of poly might but it should stop it getting stained and doesn't make it shiny or 'crunchy' feeling as I was worried a sealant might. If it does start to show any signs of damage or staining I might give it a coat of spray sealer as well. So far it's stood up to being walked on, clawed by the cats a bit (although they got shouted at for that!) and even a bit of cat puke which seems to have come off ok.
I'm planning to make a doormat for the kitchen with the rest of the fabric and the part I chopped off the original rug, so will probably seal that one as it will be for actually wiping feet on.
I'm so happy with it and surprised at how easy it was to do once I had all the materials, you can feel the texture of the original mat underneath but it's just like walking on any rug as most have some kind of weave or pattern.
The budget breakdown is:
Fabric - £35.96 (4 metres of 'Autumn Leaves' from here)
Gaffer Tape - £5.98
Carpet Adhesive - £5.98 (I bought 2 cans just in case but only used one)
Pink rug - Free :)
Dust sheets (3 used) - £5.94
Total - £53.86
So I've got a 4 metre runner for under £55, I didn't count the polyurethane spray into that total as I didn't use it (and will use it on other projects so it won't go to waste) but even with that added on it would be under £60!
This is all you need (note the end chopped off the runner as it was too long), some spray adhesive (I went for carpet adhesive), tape (I used B&Q own brand 'high strength gaffer tape' as it's a strong adhesive), a sealant (which I ended up not using!) and some drop cloths to protect the floor.
Step 1 - Measure the width of fabric you need, remember to allow a good few inches either side for the fabric to fold underneath. Then cut to size. I was doing all this in the hallway and going through into the office, as it's the longest stretch of uninterrupted floor that we have.
Step 2 - Cover the whole place in drop cloths and lay out your rubber matting or rug or whatever you're using as a base. You might also need to curse at the doorway and try to find another area to do this, fail and decide to just move the rug once you get to the door or do this thing in two halves.
Step 3 - Line up the fabric and leave enough over at the start to fold underneath.
Step 4 - My technique was to then fold the fabric back into a loose roll, stick the first part down, then just keep spraying the rug and the fabric in sections and unrolling, smoothing out as you go. The pictures probably explain it better!
I knelt on the part that I had already stuck down after smoothing it out, so I could spray the next part and then fold it over and repeat, moving the drop cloth along so I didn't get any adhesive on the front of the fabric.
The carpet adhesive stuck together instantly and was dry in only 15 minutes, so it didn't leave room for error, but also that was good as it meant when I got to the door I could fold the start end up as it was dry and pull the rug through into the hallway and not have to try to negotiate the doorway.
Step 5 - Leave the adhesive to dry, then flip over. It's a good idea to use a fresh drop cloth, as you don't want to get carpet adhesive on the front of the fabric, and that stuff gets everywhere!
Step 6 - Fold the edges over and stick them down. Make sure they're pulled in tight and the edges are all even.
Just fold the edges like wrapping a present, nice and neat you don't want any bumps showing on the top.
Step 7 - Edge the fabric with the gaffer tape to make sure it's really stuck down.
I left everything to dry overnight to make sure all the adhesive was dry and not still smelly before flipping it back over.
So here it is!
There is one more step, which would be to coat it with the poly finish, but I remembered at this point that we have a fabric protective spray (for car interiors) that would maybe be better as it's made for fabric. So Tom gave it a coat of that and we'll see if it does the job. It doesn't make it wipeable like a coat of poly might but it should stop it getting stained and doesn't make it shiny or 'crunchy' feeling as I was worried a sealant might. If it does start to show any signs of damage or staining I might give it a coat of spray sealer as well. So far it's stood up to being walked on, clawed by the cats a bit (although they got shouted at for that!) and even a bit of cat puke which seems to have come off ok.
I'm planning to make a doormat for the kitchen with the rest of the fabric and the part I chopped off the original rug, so will probably seal that one as it will be for actually wiping feet on.
I'm so happy with it and surprised at how easy it was to do once I had all the materials, you can feel the texture of the original mat underneath but it's just like walking on any rug as most have some kind of weave or pattern.
The budget breakdown is:
Fabric - £35.96 (4 metres of 'Autumn Leaves' from here)
Gaffer Tape - £5.98
Carpet Adhesive - £5.98 (I bought 2 cans just in case but only used one)
Pink rug - Free :)
Dust sheets (3 used) - £5.94
Total - £53.86
So I've got a 4 metre runner for under £55, I didn't count the polyurethane spray into that total as I didn't use it (and will use it on other projects so it won't go to waste) but even with that added on it would be under £60!
Labels:
after,
before,
carpet,
cheap,
decorating,
DIY,
fabric,
flat,
freecycle,
home,
home improvement,
homemade,
living room,
rug,
runner,
tenant
Tuesday, 23 April 2013
Runner - Phase 2
After choosing the fabric for my runner I needed to get the rubber matting that it mentioned in this how to.
I really struggled to find any that didn't cost a fortune! In our local DIY shops they didn't have any, and I looked online and there were plenty of places to buy it but it was quite expensive. Costing more than £70 for the amount that I wanted! This meant the whole point of DIYing a rug would have been lost as I would still be paying more than I wanted to.
Tom and I had a bit of a brainstorm about alternatives, and I put out a wanted ad on freecycle for carpet remnants or rugs (condition or colour not an issue) and waited for a week. I was just about to give up, and try and find somewhere to buy carpet remnants, when on the Friday I got an email from Roz that they had a long rag rug runner, she had tried to dye it red but it had gone a bit patchy and they were moving and wouldn't need such a long runner so she hadn't tried to rescue it. I went to pick it up and it was massive at least 4m long and just the right width!
I could see what she had meant about the dye job but this didn't worry me as it was going to be covered up, I had debated with myself in the car on the way to pick it up trying to re-dye it grey but it had a few holes in it and was actually too long so I was going to have to chop a bit off it. It would be better to be covered by the fabric.
I love this about freecycle, Roz had a rug that had been well used and she had tried to get more life from but in the end didn't need, and I needed a long runner but its appearance didn't matter at all, so freecycle hooked us up and she got rid of the old rug, I got just what I needed and nothing went into landfill!
I've just got to gather the rest of my materials (spray adhesive, gaffer tape and polyurethane spray or some kind of sealant) then I'll get started on this project for real!
I really struggled to find any that didn't cost a fortune! In our local DIY shops they didn't have any, and I looked online and there were plenty of places to buy it but it was quite expensive. Costing more than £70 for the amount that I wanted! This meant the whole point of DIYing a rug would have been lost as I would still be paying more than I wanted to.
Tom and I had a bit of a brainstorm about alternatives, and I put out a wanted ad on freecycle for carpet remnants or rugs (condition or colour not an issue) and waited for a week. I was just about to give up, and try and find somewhere to buy carpet remnants, when on the Friday I got an email from Roz that they had a long rag rug runner, she had tried to dye it red but it had gone a bit patchy and they were moving and wouldn't need such a long runner so she hadn't tried to rescue it. I went to pick it up and it was massive at least 4m long and just the right width!
I could see what she had meant about the dye job but this didn't worry me as it was going to be covered up, I had debated with myself in the car on the way to pick it up trying to re-dye it grey but it had a few holes in it and was actually too long so I was going to have to chop a bit off it. It would be better to be covered by the fabric.
I love this about freecycle, Roz had a rug that had been well used and she had tried to get more life from but in the end didn't need, and I needed a long runner but its appearance didn't matter at all, so freecycle hooked us up and she got rid of the old rug, I got just what I needed and nothing went into landfill!
I've just got to gather the rest of my materials (spray adhesive, gaffer tape and polyurethane spray or some kind of sealant) then I'll get started on this project for real!
Thursday, 18 April 2013
Flower Girl
I've never really been too fussed about getting flowers, and good job because I don't get many (hint hint to a certain someone), but I do like the look of fresh flowers. They really brighten up a room. At the start of the year I was given some daffodils by a friend as a house warming gift, and these tulips for helping a colleague run some meetings over last year
They just make the room a bit more colourful, I have one vase but it's a bit too big really, so I used this pot for them and I like the look of it on the coffee table.
I did get some flowers from Tom on valentines day, which did warrant using the big vase!
I've started to buy small bunches of flowers myself, mostly daffodils as they're in season and cheap, usually only £1 a bunch so always I get 2 bunches.
I like to get the ones that are still closed as they open up in a few days and last a bit longer than the ones that are already open when you buy them I think
And once they do open they are just as pretty
I'm going to try and keep up getting flowers regularly as I like having them around. Unfortunately I don't pass anywhere daily that sells flowers so try and take the opportunity when I do, like in the supermarket of from stalls in town so we will see but I hope to get some at least once a month if I can, unless someone starts to buy them for me... :)
They just make the room a bit more colourful, I have one vase but it's a bit too big really, so I used this pot for them and I like the look of it on the coffee table.
I did get some flowers from Tom on valentines day, which did warrant using the big vase!
I've started to buy small bunches of flowers myself, mostly daffodils as they're in season and cheap, usually only £1 a bunch so always I get 2 bunches.
I like to get the ones that are still closed as they open up in a few days and last a bit longer than the ones that are already open when you buy them I think
And once they do open they are just as pretty
I'm going to try and keep up getting flowers regularly as I like having them around. Unfortunately I don't pass anywhere daily that sells flowers so try and take the opportunity when I do, like in the supermarket of from stalls in town so we will see but I hope to get some at least once a month if I can, unless someone starts to buy them for me... :)
Subscribe to:
Posts (Atom)